Wednesday, March 23, 2016

Honey Banana Recipe

Friends, I have just discovered the most yummy treat! So good, in fact, I am actually still eating it as I type this out.

I pride myself on being a generally pretty healthy eater. I really had to make a habit of it a few years ago when I was diagnosed with Celiac Disease. It is one beautiful silver lining that came out from when I was so sick: I am pretty healthy eater these days! :)

However, despite the fact that I love to eat healthy, I still get SUCH sugar cravings! I have to issue insane amounts of self control when I pass the candy aisle in Target, man. And if I have a big exam coming up, a good old snack of Sour Patch Kids is how I like to treat myself while I am studying. Today though, I may have just found the game-changing snack of all snacks!  (Drumroll please!!!) Pan-seared honey bananas!

Journey with me, friends, to a land of deliciousness!

This recipe took all of five minutes to make and totally satisfied my sugar craving.

_________________________________________________________________________________

The required ingredients are ones that I always have on hand in my kitchen.

- A banana
- A bit of honey
- A sprinkle of cinnamon
- A spray of coconut oil non-stick spray


The steps to this are TOO EASY.

1. Slice your banana.
2. Lightly spray your frying pan with the coconut oil and drop in your banana slices in and let them simmer for a minute or two.


3. Using a spatula, flip the slices and drip the honey on your slices. (I just did the tiniest drop because I was concerned that if I drizzled the honey, it would burn too quickly on the hot surface of the pan.) Let them simmer again for another minute or two.

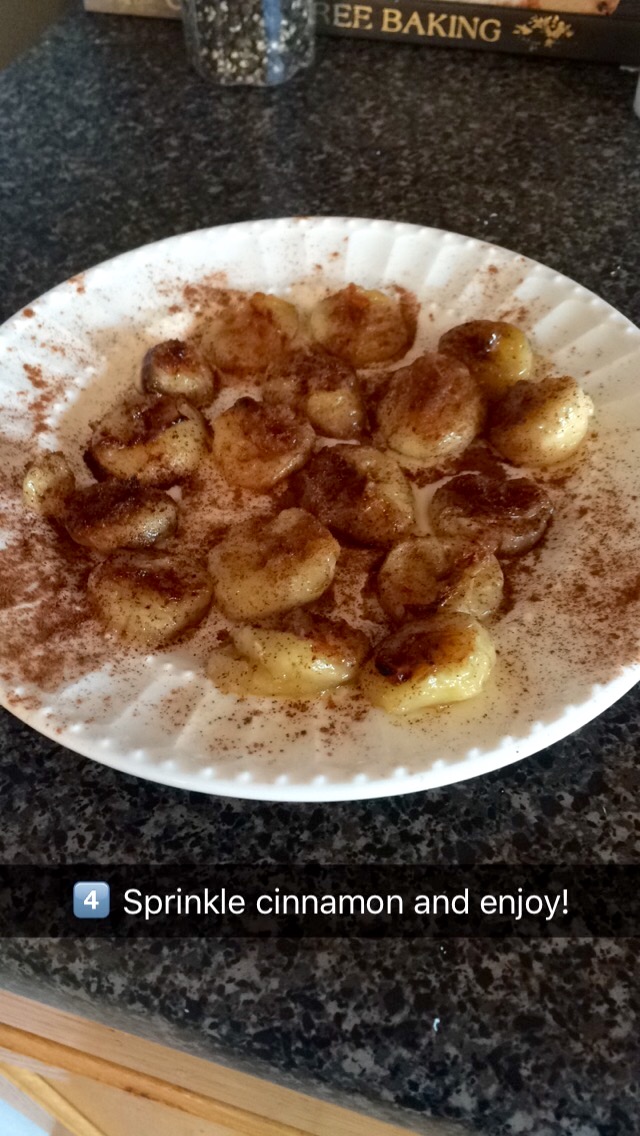
4. Transfer the slices to a dish and sprinkle cinnamon on top. Enjoy them while they are hot!

                             .  


I swear, they're like candy, but without the part where you feel like you're going to die after eating them.

Hope you all enjoy these as much as I did!

Thursday, March 10, 2016

DIY Wedding Planner

If you read my last post  -  you may have heard that C and I are engaged and full in the wedding planning swing! But I am persistant in keeping it beautiful and special, but low key and far from extravagant. I already booked a ceremony venue – it’s a mountain, it’s the woods and our reception venue is our family’s yard. Done and done. (See - low maintenance.) We are trying to rule out the unneeded added details (For example - programs or bridesmaids dresses! No need for those since our only guests at the ceremony will be the equivalent of our ‘wedding party’.)
However, I am still a planner and a micromanager. I have two to three calendars that I refer to daily to keep myself in line. It’s just who I am. So despite my best efforts to avoid wedding obsession, I wanted a wedding planner. I LOVE planners! I love organizing. And I love C and can not wait to be married to him! But every wedding planner I perused was the epitome of traditional (beautiful and bridal, but just not for me.)  and not to mention they were $30-100 each!
So, crafty little me decided to make her own!


How cute is this little binder?!

My wedding planner feat. Jefferson sleeping in the background


Here is what I used:
I turned to the glorious “Dollar Days” section in the front of target and found the following:

  • -       Little 3 ring Binder - $3
  • -       Little dividers - $3
  • -       Little pages – 3
  • -       Gift labels -$2 (used for binder tabs)

These were the sections I used for each divider (with subcategories)

  • Important
    • Behind this tab I have a wedding timeline, my bridal party info, day of the wedding checklist, an emergency list, and vendor contact info.
  • Budget
    • Behind this tab, I have lists and worksheets regarding our budget and spending for the reception, food, alcohol/drinks, flowers, photos, music, decor, ect. I also can keep a list of the costs of each vendor here.
  • Guests
    • Behind this tab is my full guest list, an organization to keep track of  info for each guest (i.e. table number, events attending, RSVP, hotel, and gifts given.) The save the date and invite info can also be filed here. 
  • Ceremony
    • Behind this tab, I can file info from our Justice of the Peace, our vows, any readings, guests attending, and a schedule. 
  • Reception
    • Behind this tab, there are many things that can be filed such as: seating plan, floor plan, vendors [catering, DJ, photographer, rentals, catering, bakery, ect,] menu, bar menu, speeches and toasts, songs/dances, activities, decor list.
  • Misc
    • Behind this tab, I will be able to keep track of any beauty details such as hair/make-up/dress, a registry list, and a list of received gifts. 
  • Blank pages
    • I like having all of the blank pages in the back as each section will require a different amount of space, so I can add to each as needed. 


From there, I searched on Pintrest (of course!) for worksheets and templates to include in this.  Making my own binder allowed me to omit the things that did not apply to me (such as putting down a deposit on my ceremony location – since mother nature is free.) but it has given me structure to organize and plan in one complied space.

This is such a simple way for me to think about our wedding celebration, but have it be my way - laid back and full of love! 

Thursday, March 3, 2016

Our Journey To "I Do"


For anyone who missed the memo (or who doesn’t follow me on Pintrest - ) Guess what!? C and I are engaged!!! As a Pintrest addict (like – if this was a diagnosis, I would be the poster child for 'Pintrest addiction'...) I regress...  – as an avid pintester, I was surprised by myself that once we were officially engaged, I had no interest in having a wedding.
I have nothing against them. They are fun and everyone deserves to have a special day. But never once have I heard a bride say “planning this wedding was so relaxing, gosh, I was never stressed once!” Never.
Again, this is just how I feel personally, but I do not want to be the one to stress and become a bridezilla. And I am pretty proud that we are homeowners at 21 and 23 years old -  with that said, the idea of spend $30,000 on one day when we could put that number towards a chunk of our mortgage – it just blows my mind!
I personally, would be over the moon to take a walk down to town hall and tie the knot with the man I want to spend the rest of my life with. It’s the marriage that I am passionate about. But to my fiancĂ©, a wedding and celebration of our love is important. I so appreciate him and that he is making sure this is a special occasion and that we'll have no regrets in acknowledging so. And I value this love so much, I am more than happy to celebrate it.
We spent a long time going back and forth with wedding ideas. Finally, we came to a decision.


New Hampshire is our mecca. It’s our safe space. It’s the most beautiful place I have ever been and I feel so lucky to have grown so much of our love in those mountains. So where better than within the forest trees to wed ourselves to one another? We plan to marry this summer at the summit of one of our favorite hikes with our parents and siblings. Later in the day we will invite friends and family to the yard in New Hampshire for a wedding celebration. 

Low key – high love. These are the values I am so excited to bring into our marriage.